

Establishing a WooCommerce retailer might be accomplished in simply two to a few hours with the precise steps, permitting you to start out accepting orders rapidly.
Important stipulations for launching embody having a registered area, a dependable internet hosting supplier, and a functioning WordPress set up.
Select a internet hosting supplier that meets WooCommerce’s technical necessities to make sure optimum efficiency and safety in your on-line retailer.
Integrating advertising and marketing automation instruments like Omnisend can considerably increase your income, with customers reportedly incomes $79 for each $1 spent on the platform.
To arrange a WooCommerce retailer, you have to make a number of key choices about internet hosting, design, funds, delivery, and taxes. That stated, you don’t want coding abilities to get began.
Whenever you observe the precise steps, you’ll be able to full your WooCommerce retailer setup in about two to a few hours. By then, your retailer can settle for orders.
WooCommerce is an open-source ecommerce plugin for WordPress. It has greater than seven million lively installations and a 4.5-star score. Retailer homeowners select it as a result of it’s versatile, dependable, and simple to make use of.
Nevertheless, merely putting in the plugin isn’t sufficient to launch a retailer. You will need to know the best way to correctly arrange your WooCommerce retailer to make sure that it really works easily. This results in higher efficiency, gross sales, and enterprise development.
This WooCommerce retailer setup information is designed for anybody launching a brand new WooCommerce retailer.
You’ll additionally find out about Omnisend, a WooCommerce advertising and marketing automation platform, and the way profitable shops use it to develop income by means of electronic mail and SMS.
What you want earlier than establishing WooCommerce
Earlier than we sort out WooCommerce retailer setup, let’s first have a look at the important thing belongings you want.
WordPress set up necessities
The primary requirement is an lively WordPress set up. Since WooCommerce is a WordPress plugin, you’ll be able to’t use it with no working WordPress web site.
The simplest option to set up WordPress is by way of your internet hosting supplier. Most internet hosting firms provide a one-click WordPress set up of their dashboards.
After buying your internet hosting plan and connecting your area identify, log in to your internet hosting account and set up WordPress.
In case your internet hosting supplier doesn’t provide one-click set up, you’ll be able to set up WordPress manually. You’ll should obtain WordPress from WordPress.org, add the recordsdata to your internet hosting account, and run the set up script.
Important stipulations guidelines
Earlier than you start putting in WooCommerce, overview this easy guidelines:
- A registered area identify that represents your model
- A dependable internet hosting supplier that helps WordPress and WooCommerce
- WordPress is put in and accessible by means of your internet hosting dashboard
With these necessities, establishing the WooCommerce retailer turns into a lot simpler.
Find out how to set up and activate WooCommerce
Establishing WooCommerce the precise manner offers your on-line retailer a robust basis for gross sales, efficiency, and long-term development.
This sensible WooCommerce retailer setup guidelines can information you thru the method:
Steps 1 to three: Basis setup (about 45 minutes)
Steps 4 to eight: Retailer configuration (about 60 to 90 minutes)
- Step 4: Add your first product — Create product listings with clear titles, costs, photos, and descriptions
- Step 5: Select and customise your theme — Choose a theme that matches your model identification and improves the buying expertise
- Step 6: Arrange delivery — Outline delivery zones and charges to make sure easy and correct supply
- Step 7: Configure taxes — Apply the right tax guidelines primarily based in your location and merchandise
- Step 8: Arrange cost gateways — Join safe cost strategies so clients can take a look at with confidence
Steps 9 to 11: Optimization and launch (about 45 minutes)
Observe these steps rigorously for a easy WooCommerce retailer setup. Your retailer needs to be absolutely useful and able to deal with clients and gross sales.
Step 1: Select your internet hosting supplier
Estimated time to finish: 15–20 minutes
Earlier than beginning your WooCommerce retailer setup, you have to select the precise host. This may prevent from efficiency issues later.
WooCommerce internet hosting necessities
Earlier than choosing a supplier, be sure that it meets WooCommerce’s technical necessities for 2026:
- PHP 8.0 or larger
- MySQL 5.7 or larger or MariaDB 10.4 or larger
- A minimum of 256 MB of WordPress reminiscence restrict
- HTTPS assist with a sound SSL certificates
Utilizing PHP 8.0 or larger improves pace and safety. An SSL certificates protects buyer information and builds belief throughout checkout. Additionally contemplate space for storing, bandwidth, automated backups, and uptime ensures.
Dependable internet hosting helps enhance web optimization as a result of engines like google favor quick and secure web sites.
There are 4 predominant sorts of internet hosting to think about:
- Shared internet hosting: usually prices $3–10/month. Inexpensive and appropriate for small shops with low site visitors.
- VPS internet hosting: Often prices $20–80/month. Provides devoted assets and higher efficiency for rising shops
- Devoted internet hosting: Typically begins at $100/month. Supplies full management and most efficiency for high-traffic shops
- Managed WordPress internet hosting: Ranges from $25–100/month. Optimized for WordPress and contains updates, backups, and enhanced safety
Advisable internet hosting suppliers
Under are a few of the greatest WooCommerce internet hosting choices really useful for customers.
| Supplier | Greatest for | Value ranging from | Standout characteristic |
|---|---|---|---|
| Bluehost | Inexperienced persons launching their first retailer | $4.99/month | WooCommerce and WordPress pre-installed |
| Pressable | Businesses and rising shops want efficiency | $25/month | Constructed for WordPress with scalable infrastructure |
| SiteGround | Retailer homeowners need professional assist | $3.99/month | Day by day backups and built-in safety instruments |
| Hostinger | Retailer homeowners needing managed WooCommerce upkeep | £12.99 ($17.43) | Optimized WooCommerce internet hosting with free SSL, caching, and simple setup |
A dependable internet hosting supplier will ship the pace, stability, and safety your WooCommerce retailer wants.
Step 2: Set up and activate WooCommerce
Estimated time to finish: About 5 minutes
Earlier than putting in the WooCommerce plugin, it’s important to have a functioning WordPress web site. When you use a really useful host, the setup will already embody primary configuration.
Nevertheless, when you’re utilizing a bunch that doesn’t natively assist it, you’ll want to put in a WordPress full package deal first.
Find out how to set up WooCommerce in WordPress
As soon as your WordPress web site is working, observe these steps to put in and activate the WooCommerce plugin:
- Log in to your WordPress dashboard utilizing your admin username and password
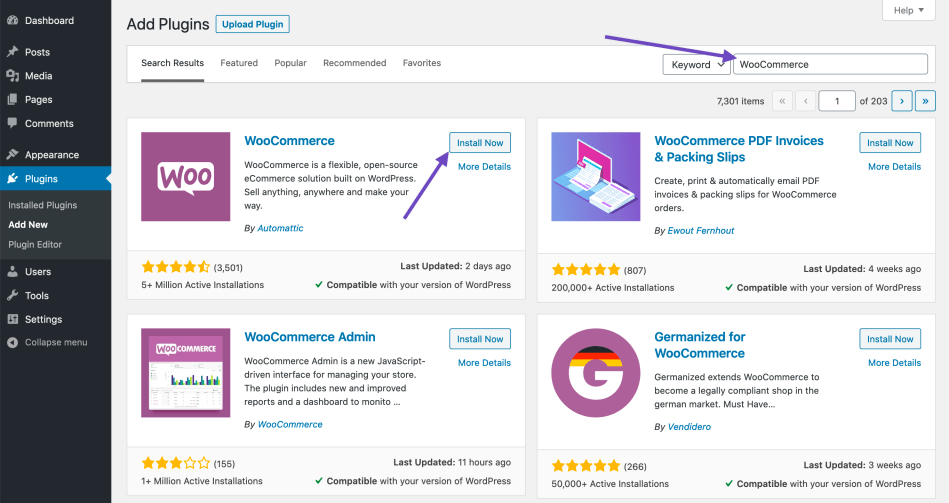
- Navigate to Plugins within the left-hand menu and click on on Add New
- Search “WooCommerce” and press Enter
- Search for the official WooCommerce plugin by WooCommerce, and click on Set up Now
- After the set up is full, click on Activate to activate the plugin
Congratulations! You efficiently put in and activated the WooCommerce plugin in your WordPress web site.
When you see an error throughout set up, verify that your internet hosting meets the minimal necessities listed in Step 1. Most points stem from outdated PHP variations or restricted server assets. Updating your internet hosting settings often resolves the issue.
Discovering extra plugins
As you construct your retailer, add extra plugins to broaden your web site features. To search out trusted WooCommerce plugins, go to the official WordPress plugin repository and kind “WooCommerce”:
You can even take concepts from our record of the very best WordPress plugins. Plugins will help enhance web optimization, pace, safety, and advertising and marketing. Nevertheless, set up solely what you want, as too many plugins can decelerate your web site.
With WooCommerce activated, you’re prepared for the following step in your WooCommerce retailer setup.
Step 3: Full the WooCommerce setup wizard
Estimated time to finish: 10–quarter-hour
After activating WooCommerce, now you can configure the WooCommerce retailer setup wizard. Whereas this step is non-obligatory, it may well assist make sure that all WooCommerce settings run easily in your retailer.
Utilizing the WooCommerce setup wizard
It’s worthwhile to observe these 5 steps to finish the WooCommerce setup wizard:
- Configure Retailer Profiler
- Activate free options
- Join Jetpack
- Full Profiler
- Evaluate the setup guidelines
Retailer profiler configuration
The Retailer Profiler is the primary and most vital display. It collects primary details about your online business.
You’ll be requested to offer the next info:
- Retailer deal with: Enter your actual enterprise deal with, which determines tax calculations and delivery zones
- Nation and area: Select the place your online business is predicated
- Forex: Choose the first forex in your goal market
- What kind of merchandise do you propose to promote: Choose the choice that greatest matches your predominant stock
- Enterprise particulars: Point out what number of merchandise you propose to show and whether or not you’re presently promoting elsewhere

Do not forget that all this info is versatile. You’ll be able to replace it later out of your dashboard.
Free options activation
Subsequent, WooCommerce will recommend free options to boost your retailer. These could embody automated taxes, WooCommerce funds, advertising and marketing instruments, and different built-in enhancements.
You’ll be able to settle for or skip any advice:

As a basic guideline:
- Allow automated tax options if you need assist calculating taxes
- Think about WooPayments if it’s accessible in your nation and also you need a easy cost setup
- Evaluate and select from any advertising and marketing or development instruments primarily based in your wants
The setup wizard recommends primary advertising and marketing options, which suggests superior advertising and marketing automation isn’t included by default. You’ll want a devoted device for electronic mail and SMS automation, which we’ll cowl in Step 9.
You’ll be able to take away any characteristic later, so there’s no long-term dedication.
Connecting Jetpack
On this step, you’ll be prompted to attach your WordPress.com account to allow Jetpack:

Jetpack provides vital options, comparable to:
- Primary safety safety
- Brute pressure assault safety
- Downtime monitoring
- Efficiency enhancements
- Exercise logs
Connecting Jetpack helps defend your retailer and enhance reliability. For many new retailer homeowners, enabling Jetpack is really useful as a result of safety and uptime are important for ecommerce.
Profiler completion
When you end these screens, the wizard will finalize your settings and put together your WooCommerce dashboard:
At this level, your core configuration is full. WooCommerce will start establishing your retailer setting primarily based in your alternatives.
Setup guidelines overview
After finishing the Retailer Profiler, you’ll see a built-in setup guidelines inside your WooCommerce dashboard:

This guidelines outlines vital remaining duties, comparable to:
- Including merchandise
- Establishing funds
- Configuring delivery
- Customizing your retailer design
As you undergo the WooCommerce setup wizard, you might need a couple of questions. Listed below are solutions to the most typical considerations:
- Can I skip the setup wizard?
Sure, however it’s not really useful as this will go away vital settings incomplete.
- Can I re-run the setup wizard later?
Sure. When you unintentionally skip it, go to WooCommerce and navigate to Assist > Setup Wizard. You’ll be able to launch it once more and overview your configuration.
Step 4: Add your first product
Estimated time to finish: About 10 minutes for a easy product
On this step of your WooCommerce retailer setup, you’ll add your first product. That is the place your retailer begins to take form and grow to be prepared for gross sales.
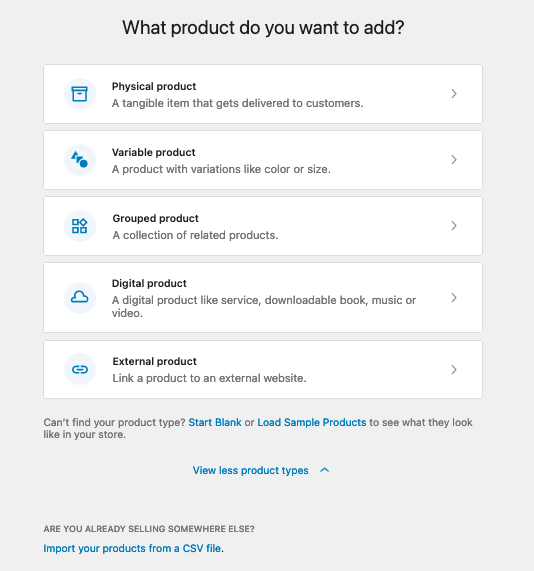
Product sorts in WooCommerce
You have got a number of choices when selecting merchandise to promote on WooCommerce:
- Bodily product: A tangible merchandise delivered to a buyer and labeled as “Easy Product” within the product editor
- Variable product: A bodily product with variations in measurement, coloration, or different attributes
- Grouped product: A group of associated merchandise offered collectively
- Digital product: A service, downloadable file, or locked content material
- Exterior product: A product listed on one other web site that you simply hyperlink to for buy
When you’re new to WooCommerce, begin with a easy product. It’s the simplest option to be taught the interface and perceive how pricing, stock, and pictures work.
Product entry strategies
There are a number of methods to enter merchandise into WooCommerce:
- Add manually: Create a product utilizing the WordPress editor with WooCommerce options
- Begin with a template: Select a pre-filled template for bodily, digital, or variable merchandise
- Import: Add product information from a CSV file
- Migrate: When you’re migrating from an current ecommerce platform, you need to use Cart2Cart to maneuver your information
Take time to write down clear product titles and detailed descriptions. Add high-quality photos. Robust product pages can enhance gross sales and enhance advertising and marketing marketing campaign efficiency.
A extra detailed information to product administration and optimization is roofed later on this article.
Step 5: Choose your theme
Estimated time to finish: About quarter-hour, together with primary customization
Your theme controls your retailer’s design, format, and buying expertise. It influences how merchandise are displayed, how briskly pages load, and the way easy the checkout course of feels. These particulars are important as a result of they have an effect on conversions and income.
Your theme additionally impacts advertising and marketing efficiency. It determines the place you’ll be able to place electronic mail signup kinds, popups, and promotional banners.
When choosing a theme, give attention to:
- Velocity and efficiency: A quick theme improves person expertise and search visibility
- Cellular-responsiveness: Your WooCommerce retailer design or theme ought to look and performance nicely on cellular gadgets
- WooCommerce compatibility: Select a theme constructed for WooCommerce to keep away from format or checkout points
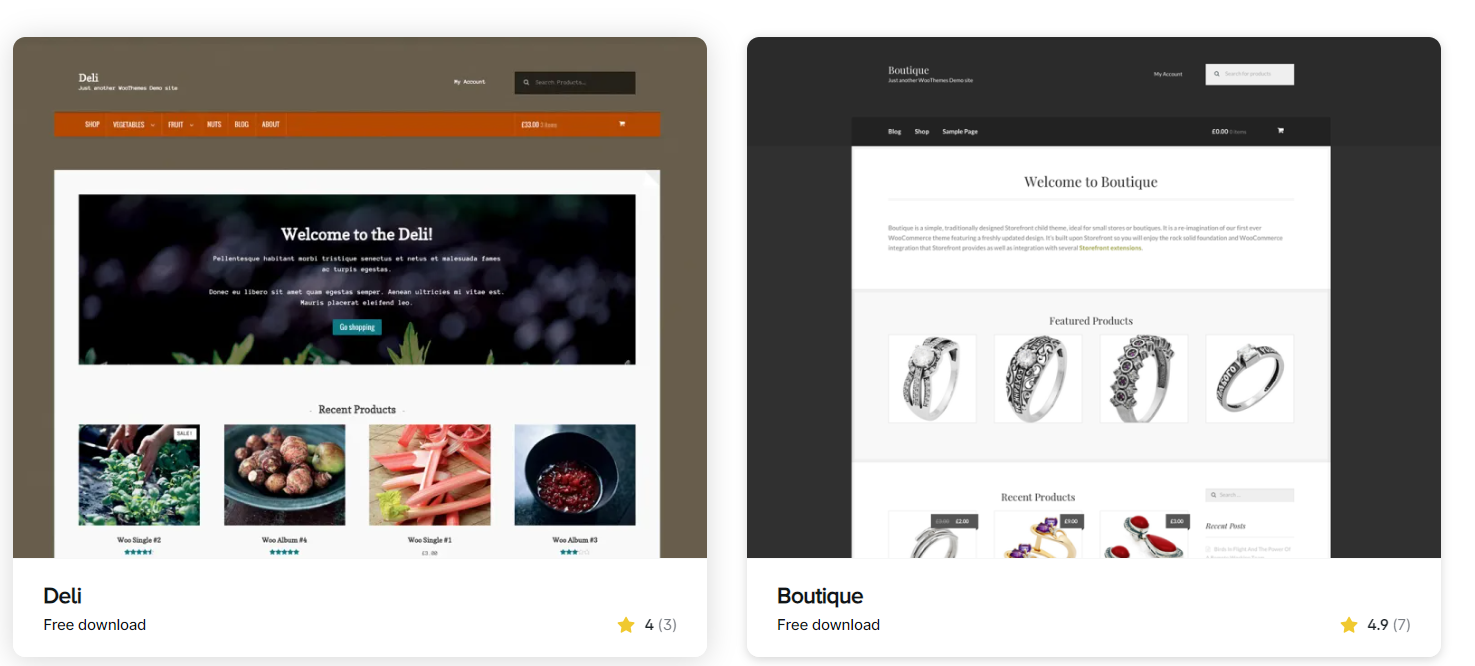
Advisable WooCommerce themes
Among the greatest WooCommerce themes embody Astra, Shoppe, and OceanWP. They’re optimized for ecommerce and provide ready-made, simply customizable templates:
Theme customization choices
After putting in your theme, go to Look > Customise in your WordPress dashboard. From there, you’ll be able to alter colours, typography, and product web page design.
Don’t fear about making all the things good immediately. You’ll be able to at all times replace or change your theme as your retailer grows. If you’d like extra design flexibility, you need to use WordPress web page builders to create customized layouts.
Step 6: Configure delivery settings
Estimated time to finish: About 15–20 minutes
WooCommerce delivery setup is essential to delivering a easy shopping for expertise. For this step, it is advisable to confirm the shop location that you simply specified within the Retailer Profiler. This location determines your default delivery origin. It additionally impacts tax and supply calculations.
Establishing delivery zones
Transport zones can help you outline the place you ship and the way a lot you cost primarily based on buyer location.
To arrange delivery zones:
- Go to WooCommerce in your dashboard
- Click on Settings > Transport
- Click on Add delivery zone
- Enter a zone identify, comparable to United States, Europe, or an area space
- Choose the areas coated in that zone
- Add delivery strategies
You’ll be able to create a number of zones for home and worldwide clients. By default, worldwide delivery is turned off, however you’ll be able to allow it by making a zone that features different nations.
If delivery choices don’t seem at checkout, be sure that the client deal with falls inside an outlined delivery zone.
WooCommerce Transport for USA shops
In case your retailer is positioned within the USA, you’ll be able to set up WooCommerce Transport. It helps you to hyperlink your retailer with WordPress.com, so you’ll be able to print delivery labels:
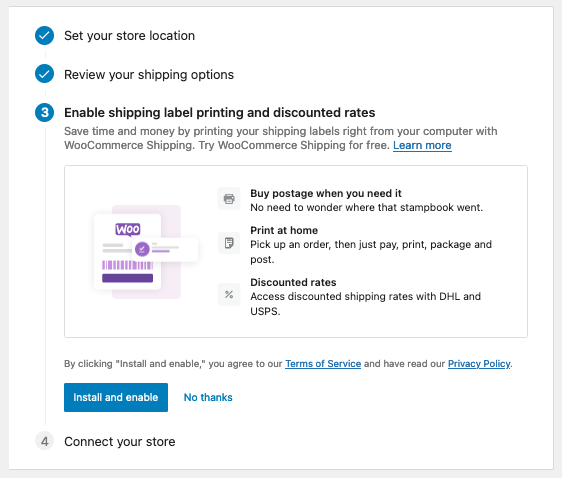
You’ll be able to provide flat fee delivery, free delivery, or native pickup. A well-liked technique is to supply free delivery on orders above a sure threshold to encourage clients so as to add extra gadgets to their carts.
For order monitoring, you’ll be able to prolong your retailer with shipment-tracking instruments that mechanically replace clients on their supply standing.
As a result of their excessive open charges, delivery notifications additionally function helpful advertising and marketing touchpoints. They provide an excellent alternative to suggest associated merchandise by means of automated electronic mail workflows.
Step 7: Arrange tax calculations
Estimated time to finish: About 10 minutes
Relying on your online business wants, WooCommerce affords a number of methods to deal with tax settings, together with:
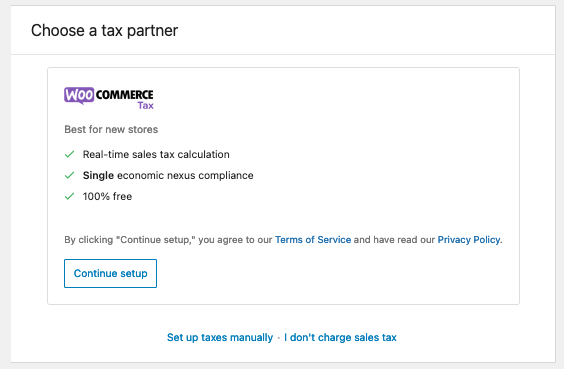
- WooCommerce Tax: This mechanically calculates how a lot gross sales tax you must accumulate. It gives info on metropolis, state, and nation gross sales tax necessities.
In case you have Jetpack put in, you can begin mechanically calculating taxes by connecting your retailer to WordPress.com. It is a handy selection for small and medium-sized shops that need automated compliance:
- Avalara: A extra strong tax compliance answer. The system calculates taxes and helps handle tax returns and tax guidelines throughout massive product units. This feature is beneficial when you promote throughout a number of states or want detailed tax reporting.
- Handbook tax configuration: You’ll be able to set tax charges manually when you desire full management. This technique requires you to outline percentages for every area and product kind. It really works nicely for companies with easy tax guidelines.
- No tax required: In case your merchandise are tax-exempt, you’ll be able to flip off tax assortment. This feature is beneficial for sure digital providers or merchandise that don’t fall below taxable classes in your area.
When you’re not sure which of those strategies to decide on, seek the advice of a tax skilled to make sure compliance with native rules.
Step 8: Configure cost gateways
Estimated time to finish: About quarter-hour
WooCommerce simplifies cost setup by mechanically putting in and activating gateways whenever you allow them in settings.
Earlier than choosing a gateway, contemplate transaction charges, regional availability, and buyer preferences. Main gateways deal with PCI compliance, so delicate cost information is processed securely.
The next are the most typical ecommerce cost processing choices in your retailer:
| Processor | Typical charge | Greatest for | Notable options |
|---|---|---|---|
| Stripe | 2.9% + $0.30 per transaction | Subscriptions and world gross sales | Helps playing cards, Apple Pay, Google Pay, and recurring billing |
| PayPal | 3.4% + mounted charge | International cost recognition | Redirect checkout, sturdy purchaser safety |
| Sq. | $49/month/location | On-line and in-person shops | POS integration, reward playing cards, Money App |
| WooPayments | Free | Native WooCommerce integration | Managed contained in the dashboard, multi-currency assist |
Stripe

Stripe helps bank cards and digital wallets. It’s accessible in lots of nations. It affords a easy checkout expertise and helps recurring funds. This makes it appropriate for subscription merchandise and companies serving worldwide clients.
PayPal

PayPal is well known and trusted by web shoppers. Clients full transactions on PayPal’s platform, which provides an additional layer of safety. It really works nicely for companies that need a easy cost choice with world recognition.
Sq.
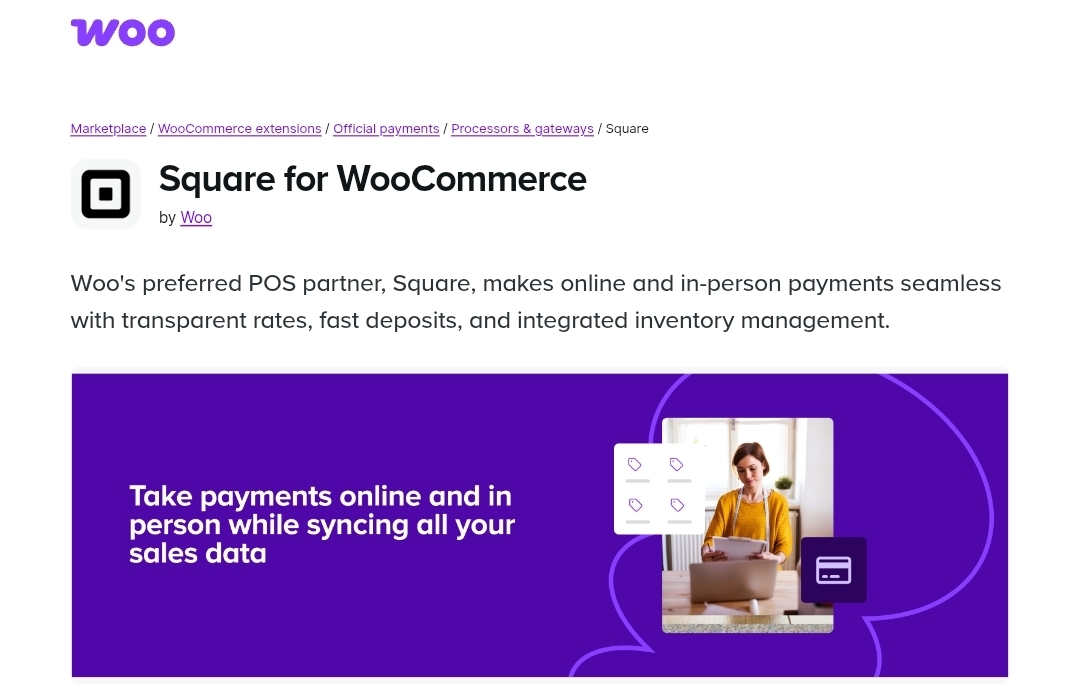
Sq. accepts on-line and in-person funds, making it helpful for companies that function each on-line and bodily areas. It additionally helps digital wallets and reward playing cards. This flexibility fits retailers with omnichannel gross sales.
WooPayments
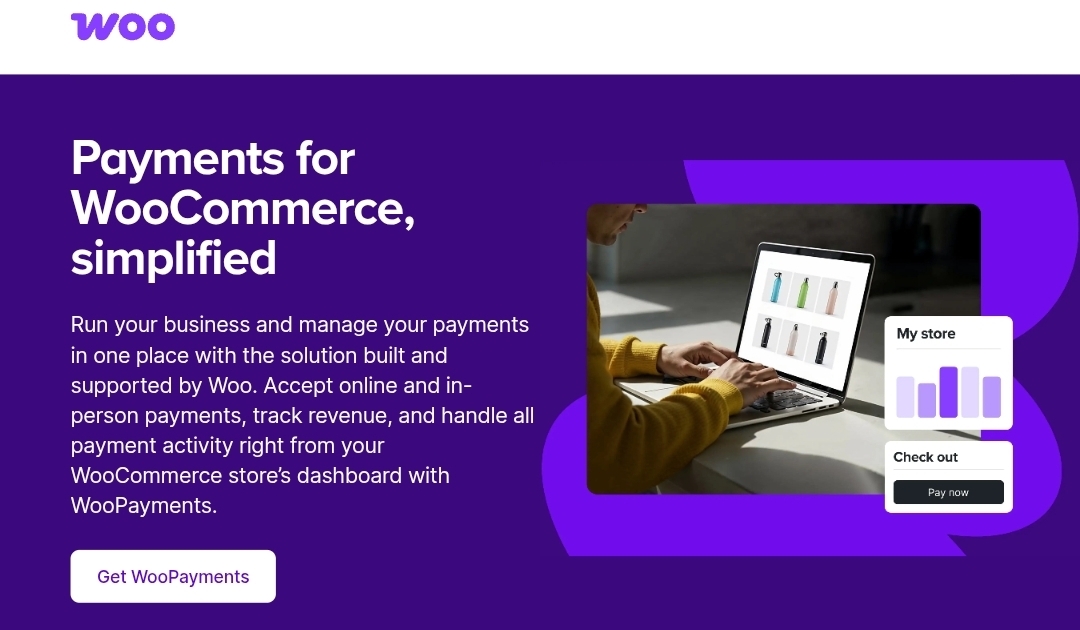
WooPayments integrates immediately together with your retailer and gives a streamlined checkout expertise. It helps main cost strategies and simplifies administration contained in the WooCommerce dashboard. It’s a handy selection for companies that need native integration.
Which cost gateway must you select?
Stripe works nicely for worldwide clients and subscription fashions. Many consumers belief PayPal, and it gives easy world protection. Sq. is right when you additionally promote in particular person. WooPayments affords deep integration and simple administration.
You’ll be able to allow a number of gateways to offer a number of choices at checkout. After configuration, check the checkout and cost course of with a small order to substantiate.
Step 9: Set up important extensions
Estimated time to finish: About 20 minutes to analysis, select, and set up the precise extensions
At this level, your WooCommerce retailer setup is full. Nevertheless, WooCommerce gives customers with extra free or paid instruments that assist run their retailer easily.
Begin with instruments that immediately impression income. It is best to prioritize advertising and marketing automation and analytics. Analytics instruments show you how to accumulate retailer information and analyze it to make higher choices. In the meantime, WordPress automation instruments will help you join completely different apps and cut back repetitive, guide duties that would decelerate operations.
As your retailer continues to develop, you’ll be able to set up different WooCommerce plugins as wanted.
For now, listed here are some automation and analytics instruments we extremely suggest.
Omnisend for electronic mail and SMS advertising and marketing

As a prime WooCommerce plugin, Omnisend helps combine automated electronic mail advertising and marketing and SMS features into your advertising and marketing technique.
Omnisend clients see a median of $79 in income for each $1 spent on the platform throughout electronic mail, SMS, and push notifications.
With pre-built automation workflows, you’ll be able to launch welcome emails, deserted cart restoration, order confirmations, and follow-ups inside minutes. You additionally get SMS integration, superior viewers segmentation, and product suggestions inside emails.
One other nice characteristic is the viewers sync for adverts. This synchronizes your current subscribers or clients to Fb’s or Google’s advert platforms for higher focusing on.
Not like some advertising and marketing instruments that prohibit options to higher-priced plans, Omnisend’s free plan contains full ecommerce capabilities. You additionally get 24/7 buyer assist on each plan, together with the free one.
Your WooCommerce retailer setup received’t be full with out advertising and marketing automation. Automated campaigns convert guests into subscribers and subscribers into repeat clients.
Generate as much as $6.30 per electronic mail with our WooCommerce electronic mail advertising and marketing plugin
Fast enroll | No bank card required
Web site Equipment by Google

This Google plugin is a robust device for WooCommerce analytics. It brings the facility of Google Analytics, Google Search Console, and Google AdSense to your retailer.
With this device, you’ll be able to perceive the place you stand by way of web optimization, web page expertise, and site visitors era.
The plugin from WordPress additionally gives detailed insights that may information your retailer’s advertising and marketing technique:
MonsterInsights
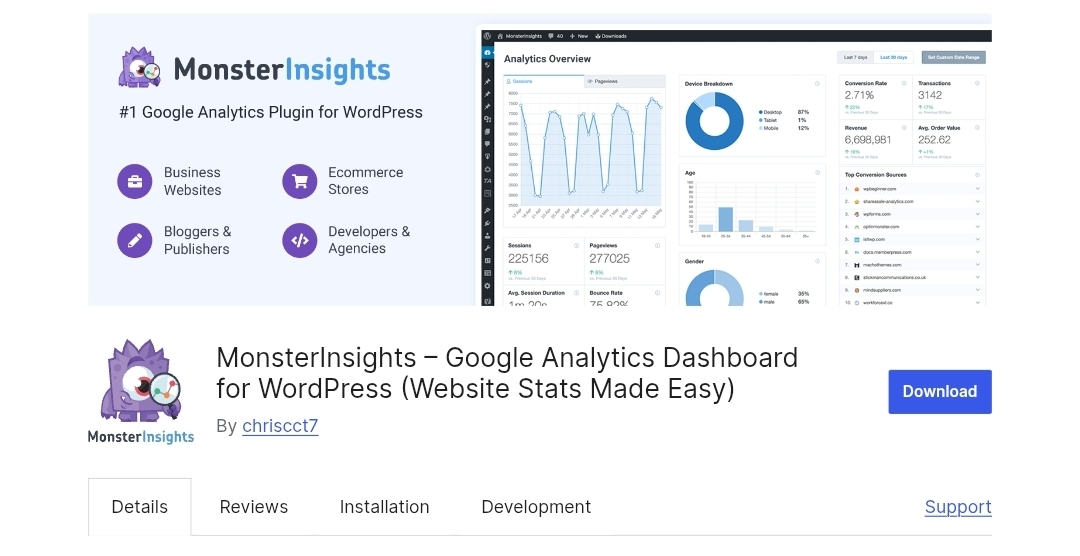
MonsterInsights is the very best Google Analytics plugin for WordPress, utilized by 3,000,000+ web site homeowners. It comes with an ecommerce add-on that permits you to simply monitor your WooCommerce retailer’s conversions.
In MonsterInsights’ ecommerce experiences, you’ll be able to immediately view your income, transactions, common order worth, and extra.
Furthermore, you need to use MonsterInsights’ In style Posts characteristic to establish your top-selling merchandise. Then, you’ll be able to simply show these well-liked merchandise anyplace in your WooCommerce web site to enhance gross sales:

Zapier
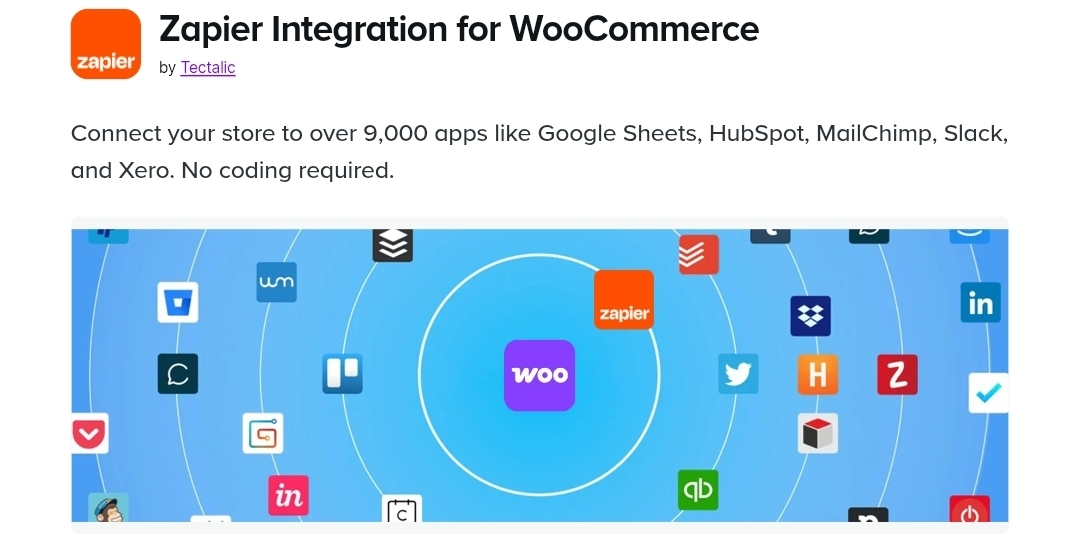
Including Zapier to your record of WooCommerce extensions is a no brainer. This versatile platform helps join your WooCommerce retailer to 7,000+ cloud apps and providers to broaden its performance. Nevertheless, we’d like to notice that this can be a paid extension.
Step 10: Handle your retailer
Estimated time to finish: Ongoing
After you end the shop setup guidelines (or conceal it), the shop administration widget will pop up. This widget gives handy hyperlinks to probably the most regularly used WooCommerce pages for retailer administration:
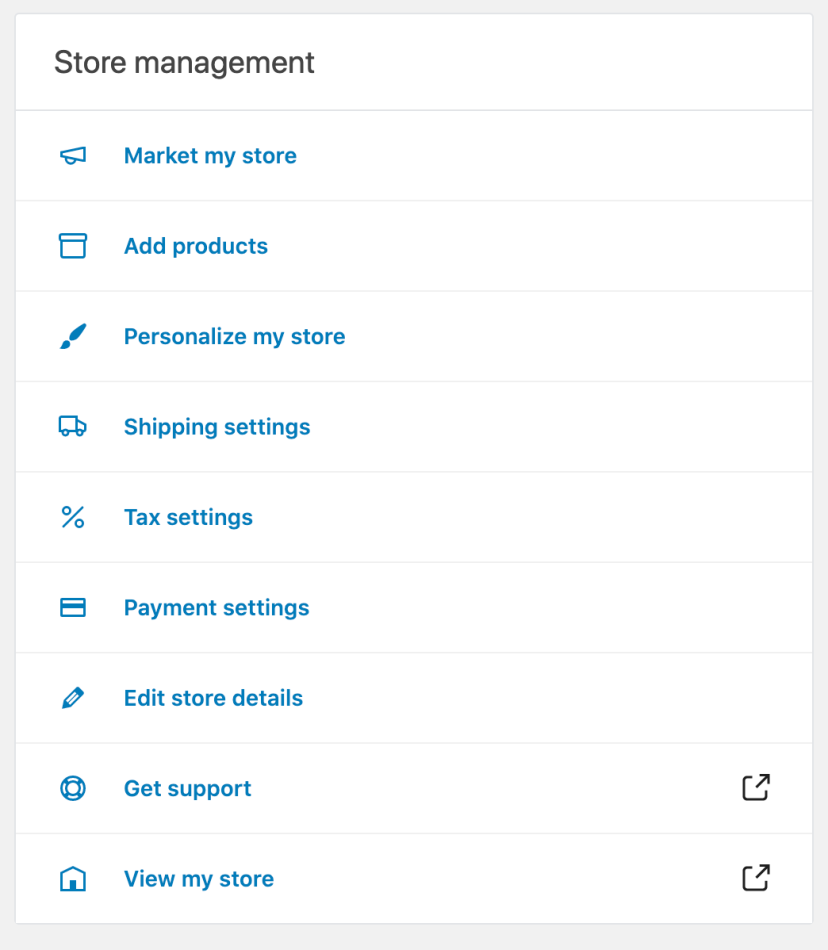
Retailer administration dashboard
From right here, you’ll be able to course of orders, replace order statuses, handle refunds, and monitor stock ranges. The dashboard gives fast entry to merchandise, coupons, experiences, and settings. This manner, you don’t should navigate by means of a number of menus to run your retailer.
Product information configuration
Inside your dashboard, you’ll be able to replace pricing, handle inventory portions, and edit product descriptions at any time. You can even sync buyer and order information with advertising and marketing instruments like Omnisend, enabling customized campaigns primarily based on actual buy habits.
Step 11: Take a look at and launch your retailer
Estimated time to finish: 15–20 minutes for an intensive verification
At this level, your ecommerce retailer is sort of prepared for launch. All that’s left to do is to re-check whether or not all retailer pages are up and working:
Pre-launch verification guidelines
Earlier than going dwell, undergo this structured guidelines to make sure all the things works as anticipated:
- Take a look at the whole buy stream (add to cart → checkout → order affirmation web page)
- Confirm mobile-responsiveness on completely different display sizes
- Verify that your SSL certificates is lively (your URL ought to start with https://)
- Take a look at electronic mail notifications (order affirmation, delivery affirmation)
- Verify that each one cost strategies course of transactions accurately
- Confirm delivery charges are calculated precisely primarily based on location
- Evaluate product pages for proper pricing, photos, descriptions, and inventory standing
Go to your web site as a buyer would and undergo your store, cart, cost, and checkout pages.
Touring the skeleton pages helps you to examine that all the things is ready up accurately and matches your preferences.
Putting check orders
You can additionally place a couple of check orders to see whether or not your entire system is functioning correctly.
In case your WooCommerce retailer requires any modifications, you can also make them at any time by going to the Settings tab. Right here, you’ll be capable to modify store pages, stock, delivery, cost, and extra:

Find out how to add merchandise on WooCommerce
The estimated time is round 5–10 minutes per product, relying on the element of your descriptions and pictures.
Now that you simply’ve put in and arrange your retailer, let’s overview the best way to use WooCommerce so as to add merchandise.
So as to add a brand new product, click on on the Merchandise tab on the left-hand aspect of the dashboard and click on Add New. A display much like the one beneath will seem:
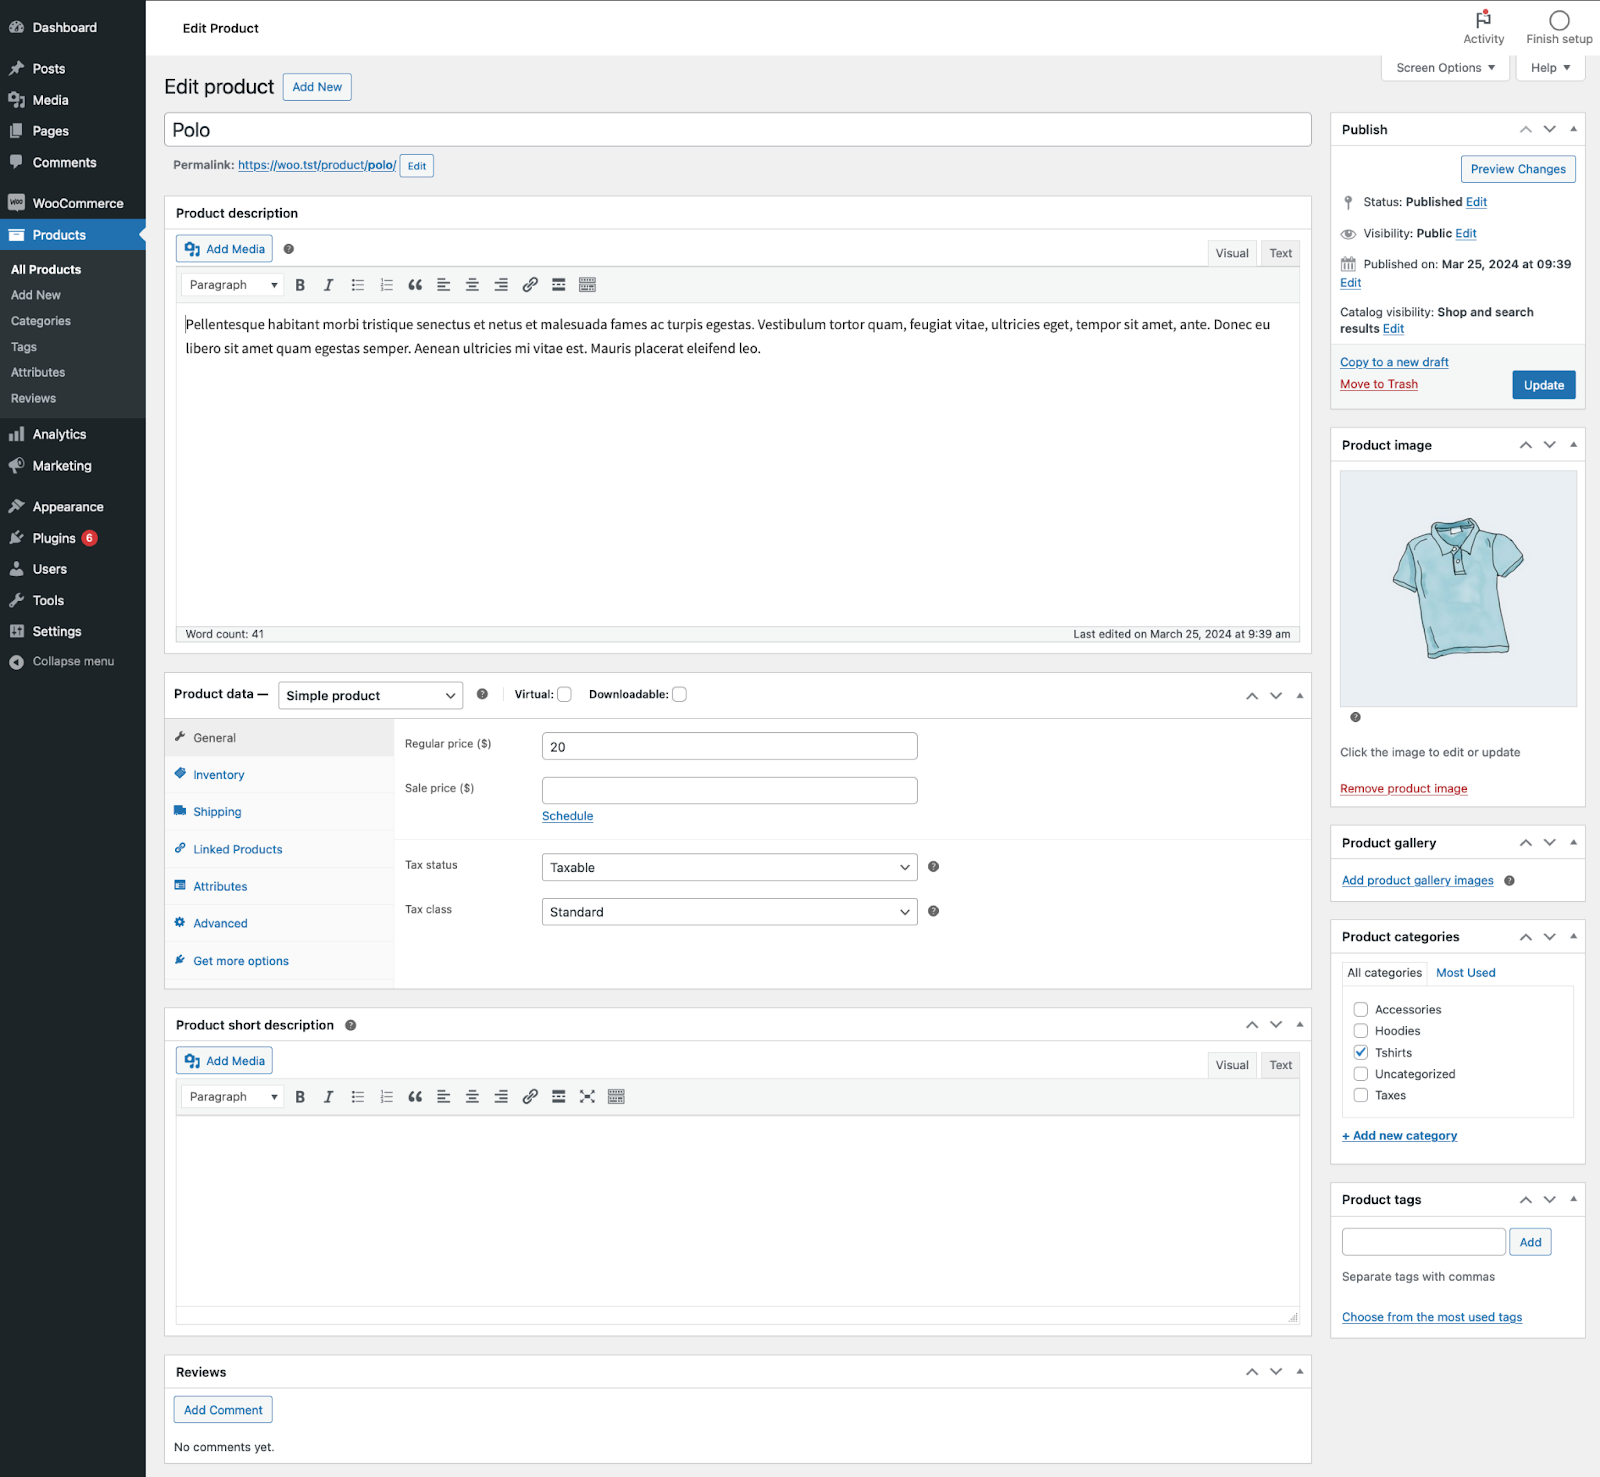
Proceed so as to add your product title and an outline detailing its key options and advantages.
When writing product titles and descriptions, use key phrases your clients seek for. Additionally, write benefit-driven copy, not simply primary options.
For descriptions, it’s additionally vital to write down quick paragraphs or bullet factors to make them simpler to scan.
Properly-crafted product descriptions and high-quality photos can enhance web optimization and on-site conversions. It will possibly additionally energy your advertising and marketing campaigns when merchandise are featured in emails and adverts.
Product administration
Managing your merchandise is an important a part of working your WooCommerce retailer. Understanding the best way to enter, categorize, and label your merchandise correctly improves visibility, navigation, and reporting.
Product sorts
WooCommerce lets you promote a number of product sorts, together with easy, grouped, and variable merchandise. Selecting the right product kind can guarantee correct pricing, variation dealing with, and stock monitoring.
Product classes
Grouping your merchandise into classes helps clients simply discover what they’re searching for. For instance, when you promote gymnasium tools, you’ll have classes for “weights,” “treadmills,” and “train bikes.” This manner, clients can rapidly find merchandise in the identical class. You’ll be able to create as many classes as you need and alter them anytime.
Product labels
Labels, also referred to as tags or attributes, assist filter merchandise. Measurement, coloration, and materials are widespread examples that assist customers refine their search. You’ll be able to assign labels individually to every product or configure world attributes to use throughout a number of gadgets.
Product information part
This part accommodates practically all of the important details about your product. At this level in our WooCommerce setup tutorial, we’ll have a look at the assorted sections on the product information web page.
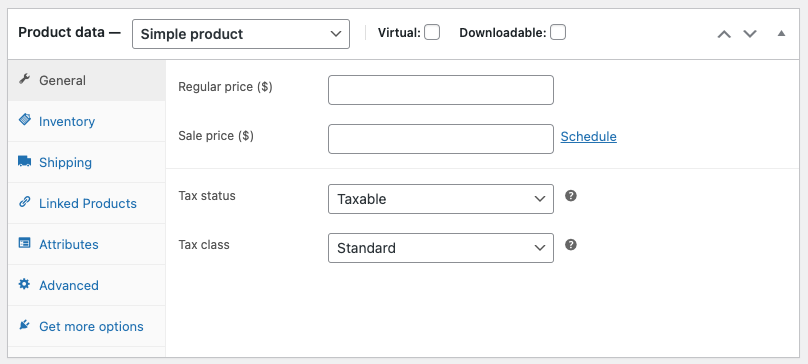
Basic information
To begin, you’ll want so as to add the product’s value. Point out the common value. If there’s a sale value, enter the discounted quantity. You will need to additionally present the product’s tax standing and tax class:
Stock part
This vital part helps you handle merchandise individually, together with the flexibility to permit backorders. Right here’s the place you permit clients to decide on merchandise and add them to the cart.
For higher stock administration, you’ll have to allow inventory administration:
When you enter the inventory amount, WooCommerce will mechanically handle the shop’s stock and replace the standing to indicate if an merchandise is in inventory or out of inventory.
Higher but, you’ll be able to specify the Low Inventory Threshold. This units the quantity at which you’ll be notified if a product is working low in your stock.
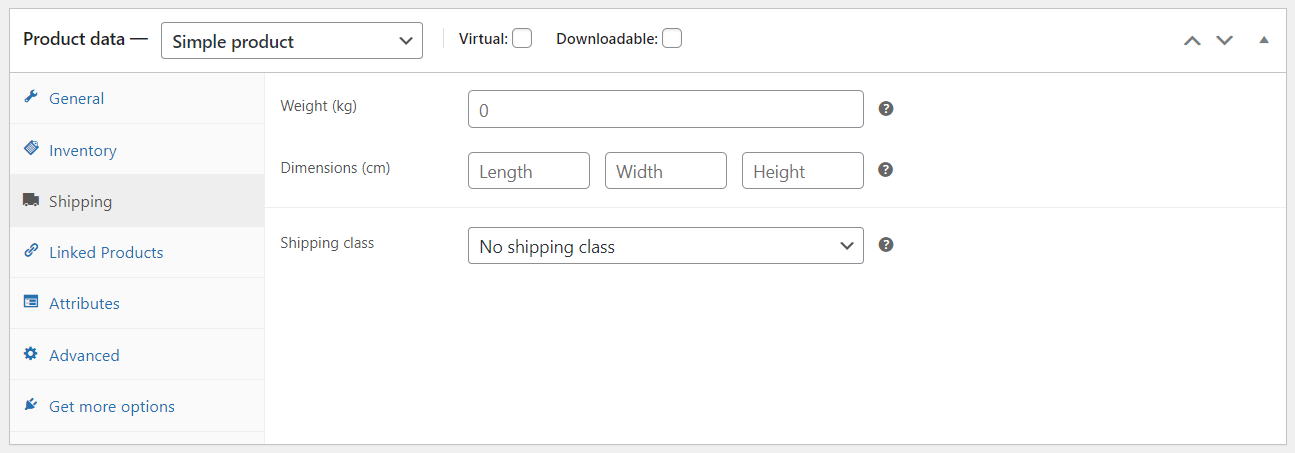
Transport part
Right here, you’ll should enter delivery info, comparable to the load and dimensions of the product and delivery class:
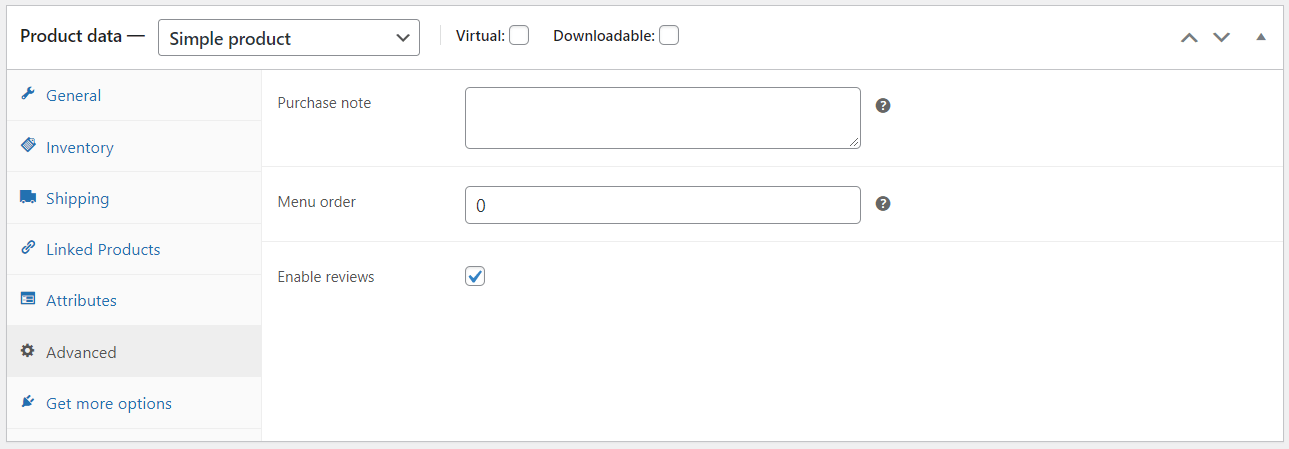
Superior part
Though that is non-obligatory, you could add some superior particulars to boost the client expertise on the location:

You even have the choice to incorporate a purchase order be aware. That is despatched to the client after a purchase order. You can even flip buyer critiques on or off.
When you’ve accomplished all sections, click on Publish. Repeat this course of for every product in your catalog. Keep in mind to maintain formatting constant and optimize descriptions.
Customizing your WooCommerce retailer
Thus far, this WooCommerce retailer setup tutorial has proven you the best way to arrange your retailer and add new merchandise.
Now, let’s have a look at a few options you’ll be able to customise to make sure your retailer runs easily.
Superior WooCommerce settings
WooCommerce helps you to change some default settings and join your retailer to exterior instruments. To entry these choices, navigate to the Superior choice below Settings. Right here, you’ll discover Web page Setup, REST API, Webhooks, and Legacy API.
Web page setup
You’ll be able to assign pages aside from the default ones for Cart, Checkout, My Account, and Phrases and Circumstances.
- Cart web page: Reveals gadgets in your buyer’s cart
- Checkout web page: The place your buyer will enter their cost info and submit orders
- My Account web page: The place registered clients will go to view their orders or replace their account particulars
- Phrases and circumstances: The place clients can overview your retailer’s phrases and circumstances on refunds, returns, and extra
Adjustments on this part needs to be made with care. As an example, when you assign the improper web page as your checkout web page, clients received’t be capable to full purchases.
Relaxation API
You’ll be able to create API keys to make use of the WooCommerce REST API. This may permit builders to attach the WooCommerce platform with exterior functions. Technical customers could discover this beneficial when managing their very own integrations throughout their advertising and marketing tech stack.
Coupons and reductions
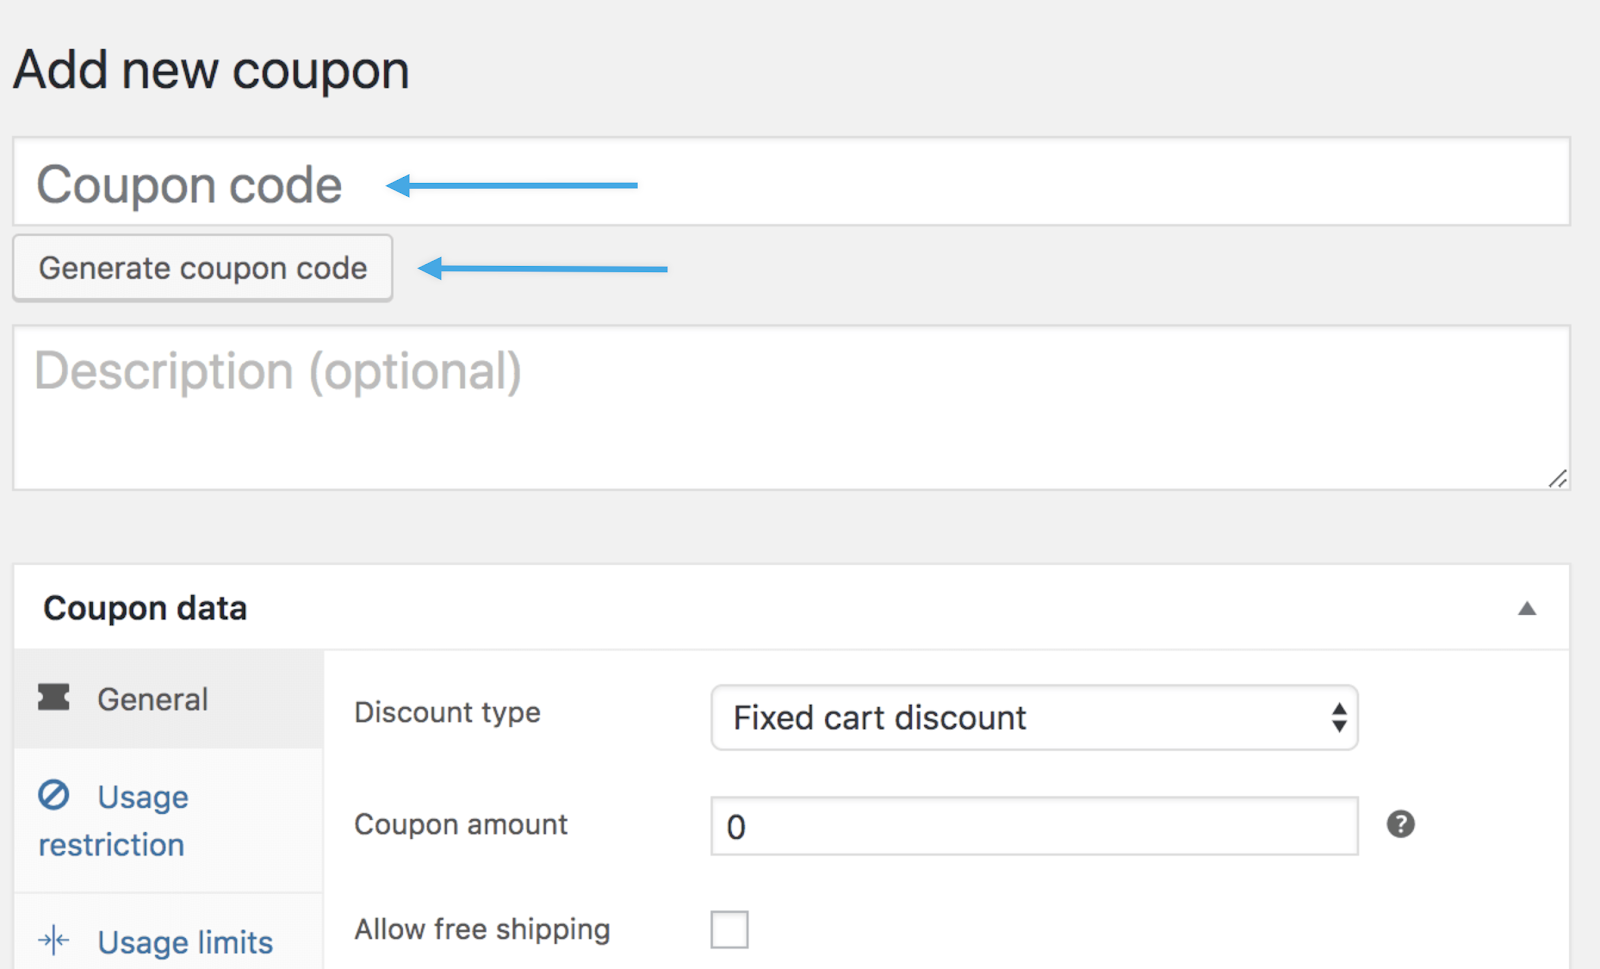
Coupons are a good way to enhance gross sales. So as to add coupons, go to Advertising and marketing in your WooCommerce dashboard. Then, click on on Create New Coupon.
Add the coupon code and a brief description of the coupon.
Within the Basic part, you’ll be able to add primary info, comparable to the kind of coupon, its worth, and the expiry date:
Furthermore, below the Utilization restriction tab, you’ll be able to set the minimal spend essential to activate the coupon.
You can even click on on Particular person use solely to stop the coupon from being mixed with different coupons in the identical order. As soon as set, publish the coupon and let clients find out about it.
Coupons and low cost codes are extra highly effective when built-in into your advertising and marketing automation technique. As an alternative of displaying the identical public code to everybody, you’ll be able to ship focused or distinctive low cost codes by means of automated electronic mail flows.
Customized codes enhance urgency, enhance monitoring accuracy, and assist measure marketing campaign efficiency extra exactly.
Account and privateness settings
Take a look at the Accounts and Privateness tab for extra vital settings that you simply’ll have to customise to assist information a buyer’s expertise:

By ticking the settings below Visitor Checkout, you’ll be able to permit clients to purchase merchandise with out creating an account. This flexibility will help enhance your conversion fee. It encourages extra purchases, significantly amongst clients who may discover filling out a registration kind tedious.
You can even management account settings and private information settings from right here.
Sustaining your WooCommerce retailer
After you full your WooCommerce retailer setup, you have to know the best way to maintain your retailer protected, safe, and working easily. Listed below are some ideas that can assist you keep your WooCommerce retailer.
Software program updates
You will need to maintain your WooCommerce retailer’s software program updated. That is essential for safety and easy operations.
- Recurrently replace WordPress core, WooCommerce, your theme, and any plugins when new variations can be found
- Earlier than making use of main updates, check them on a staging web site if attainable
For smaller shops, schedule a weekly examine to overview accessible updates and apply them throughout low-traffic durations.
Backups and safety
Backups guarantee you’ll be able to rapidly get better from technical points, cyberattacks, or unintentional modifications.
- Recurrently again up your WooCommerce database and recordsdata to keep away from shedding important information
- Use dependable backup options comparable to Jetpack Backup which makes real-time backups of your web site’s information
- Use sturdy passwords, allow two-factor authentication the place attainable, and restrict admin entry to trusted customers solely
Efficiency monitoring
Monitoring your retailer’s efficiency and analytics helps you make knowledgeable choices.
- Maintain an in depth eye in your retailer’s efficiency utilizing WooCommerce Analytics
- Observe metrics like gross sales, orders, and refunds, in addition to reductions, taxes, and extra
- Run periodic pace assessments and optimize photos, internet hosting, or plugins if load occasions enhance
Buyer assist
Offering glorious buyer assist is essential to boosting buyer satisfaction and loyalty.
- Present immediate and useful buyer assist to deal with inquiries, points, and considerations
- Deal with refunds and returns effectively to keep up buyer satisfaction
- Recurrently replace your FAQ part and supply self-help assets to cut back repetitive questions
WooCommerce setup guidelines abstract
The WooCommerce setup guidelines beneath offers you a concise reference, permitting you to trace your progress as you construct your retailer:
The whole estimated time to finish your WooCommerce retailer setup is about two to a few hours. Confirm that each step of your setup is accomplished and that your retailer is prepared for purchasers.
Conclusion
There’s little doubt that WooCommerce is the very best ecommerce plugin on WordPress. It offers you full management over your ecommerce retailer setup and integrates completely with WordPress.
The method to arrange a WooCommerce retailer entails selecting internet hosting, putting in the plugin, configuring funds and delivery, and optimizing your retailer for development. As soon as these steps are full, you’ll have a useful and revenue-ready on-line store.
Nevertheless, the WooCommerce retailer setup is simply the start. To construct a profitable ecommerce enterprise, you want advertising and marketing and buyer engagement.
WooCommerce advertising and marketing automation helps you ship focused emails and construct buyer relationships.
Simply automate your WooCommerce advertising and marketing with Omnisend’s automated options. With this device, ecommerce companies can generate as much as $79 in income for each $1 spent throughout their advertising and marketing channels. That is in keeping with Omnisend’s inside information.
With automation, you’ll be able to optimize your retailer for buyer engagement and long-term profitability.
Make sure the profitability of your WooCommerce retailer with advertising and marketing automation
Fast enroll | No bank card required
FAQs
You want a site identify, webhosting, WordPress set up, and the WooCommerce plugin for WooCommerce retailer setup. You want about $50–$200 for the primary 12 months. This covers internet hosting, area registration, and a primary theme.
The core WooCommerce plugin is free to put in. Nevertheless, working an internet retailer entails different prices comparable to internet hosting, a site identify, themes, and extensions.
Primary internet hosting can value anyplace from $3 to $30/month. In the meantime, a site can value about $10–15/12 months. Premium extensions and themes are non-obligatory, however they will broaden your retailer’s performance and customization choices.
Sure, WooCommerce is appropriate for freshmen as a result of it integrates with WordPress and features a setup wizard to information you thru the setup. Nevertheless, it requires extra hands-on configuration for internet hosting, plugins, and settings than hosted platforms. The training curve is manageable, however you’ll should observe step-by-step directions.
A primary retailer with merchandise, funds, and delivery configuration might be prepared in a single to 2 hours. Implementing full customization utilizing extensions and advertising and marketing automation instruments like Omnisend could add one other 30–60 minutes. Nevertheless, this could enhance income potential. Use the WooCommerce retailer setup guidelines to make sure you don’t miss any vital steps.
WooCommerce and Shopify serve completely different wants. WooCommerce offers you management over your retailer and prices much less since you pay just for internet hosting and non-obligatory extensions. Shopify is a hosted platform that simplifies setup and upkeep, however you’ll should pay month-to-month charges and transaction prices.
WooCommerce requires self-managed internet hosting and common updates. Not like hosted platforms, you’re chargeable for safety and efficiency. The training curve is steeper since you should configure settings and plugins.
WooCommerce doesn’t cost a month-to-month charge because the plugin is free to make use of. Your month-to-month prices come from internet hosting and non-obligatory premium extensions.
Month-to-month bills rely on internet hosting and non-obligatory extensions. Internet hosting usually prices $3–$30. Premium themes and extensions are non-obligatory. Many important extensions, together with the Omnisend advertising and marketing automation answer, provide a free plan to start out.